

Choosing a CO₂ laser engraving machine comes down to four things: materials, power, tube/cooling quality.
- Match the machine to your materials
CO₂ lasers are best for wood, acrylic, leather, fabric, paper, glass, and some plastics.918 If you mainly serve Western buyers with wooden gifts, acrylic signage, leather goods, or personalized decor, CO₂ is usually the right choice. If metal marking is required, consider a fiber laser or a dual-source machine instead.
- Choose power by workload, not by “bigger is better”; below is the reference.
| Power | Best fit | Typical capability |
|---|---|---|
| 40–60W | Samples, small orders, fine engraving | Thin wood/acrylic ≤6mm |
| 80–100W | Small business / light production | Thicker acrylic/wood, faster engraving |
| 120–150W+ | Heavier cutting, batch production | 10–12mm+ materials, higher throughput |
- Glass Tube VS RF Tube
Glass CO₂ tube: lower upfront cost, good for cutting and general engraving, but shorter lifespan and needs water cooling.
RF metal CO₂ tube: higher cost, longer lifespan, more stable beam, better for fine engraving and continuous production.
Typical lifespans: glass tubes around 2,000–10,000 hours, RF tubes 20,000–50,000 hours.
- Cooling System Matters A Lot
Most CO₂ lasers need water cooling. For stable performance, coolant temperature should usually stay around 15–25°C.7 For ≤80W glass tubes, a basic chiller may work; Aquila 5030 and 7045 lasers are typical models; for 80–150W or continuous operation, use a compressor-based industrial chiller with stable temperature control; Aquila 9060 and 1490 models are typical ones.
Also check: air assist, exhaust fan, fume extraction, and whether the machine can run safely in your workshop environment.

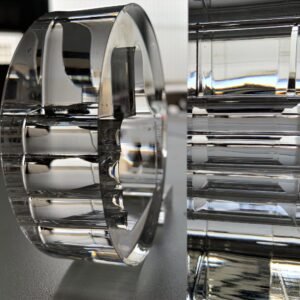

3/8-inch (30mm) thick acrylic can be cut with a laser, but it requires a 300W+ CO₂ laser system and results in low efficiency. For 2-inch (50mm) thick acrylic, laser cutting is not recommended—CNC machining or routing is the preferred method.
- Feasibility&Results
Technically feasible with 300W CO₂ laser.
Key Process Parameters
Power: 300W minimum.
Lens: 127mm (5-inch) long focal length.
Focal Position: Adjust to 1/3 material depth.
Air Pressure: Keep below 0.2 bar to prevent whitened edges
- Equipment Recommendations
Aquila 1390S or 1325S 300W laser can cut in one pass at a speed of 0.8~1mm/s.
Work Area: Matches sheet size (1390S 130m×900mm or 1325S 1300m×2500mm, 51×35 inches or 51×98 inches).
High-capacity CW6000 water chiller. Strong dual-fan fume extraction system. Large-diameter nozzle and water-cooled optics for high-power laser.
- Laser Cutting Guides of 30mm Acrylics
- Find out the right speed. Start with slow speed (~0.04 in/s / 1 mm/s) for test cuts. Gradually increase speed to find the best balance between edge quality and efficiency.
- Watch the defects. Streaking/scoring → Reduce speed. Yellowing/charring → Increase speed or reduce power.
- Focal Point Fine-Tuning. For 1.18 in (30 mm) thick acrylic, set focus ~0.39 in (10 mm) below surface (~1/3 thickness). Test focal positions at: ¼ thickness (~0.3 in / 7.5 mm depth), ⅓ thickness (~0.39 in / 10 mm depth), ½ thickness (~0.6 in / 15 mm depth). Choose the position yielding the most uniform edge finish (top and bottom).
- Key Tips
- Initial Calibration: Always start with test cuts (4×4 inch / 100×100 mm square) in a parameter matrix. Record edge quality for each setting before full production.
- Before Mass Production: Verify material batch consistency—cutting parameters may vary between brands & batches of acrylic.
- Safety Warning: Never leave unattended during cutting—1.18 in (30 mm) acrylic requires long processing time. Ensure proper ventilation & fire safety measures (exhaust system, fire extinguisher nearby).
